Web form is a mean of communication between people who visited your blog/web page and you. It can be an order form, a feedback form, or anything you wish to communicate or name it.
When creating a web form, you need to consider few things of such important:
1. It is free
2. Easy to use - to create, to edit and maintain
3. It has notification - it will notify you promptly each time people fill in.
...and most important of all, it has no hanky-panky like "click this to upgrade to premium what-so-ever" kind of upselling.

I am inspired to write this because some weeks ago, a friend asked me how to it. She's a newbie to blogger and blogspot, and was clueless how to do it. I gave her a quick guide but she complained, that was not helping. I advised her to google the the Youtube, but to be frank, I seldom find solution from Youtube myself. (unless there is no option) Very true, Youtube is friendly in terms of visualizing, but he is fat and hungry - and will eat out a lot of my broadband quota. Plus the speed of the broadband here is slower than a tortoise.
So now, I am going to show you how to create this using the free Google Form.People says, use as much as Google products because they are the "big giant" of the industry. If next time they diversify and and open chain-restaurants, go and have your breakfast, lunch and dinner, and if you can, sleep there :)
So in order to do this:
1. You need to have google account. Create one if you dont have.
2. Go to http://drive.google.com and log in

3. Click Create > Spreadsheet

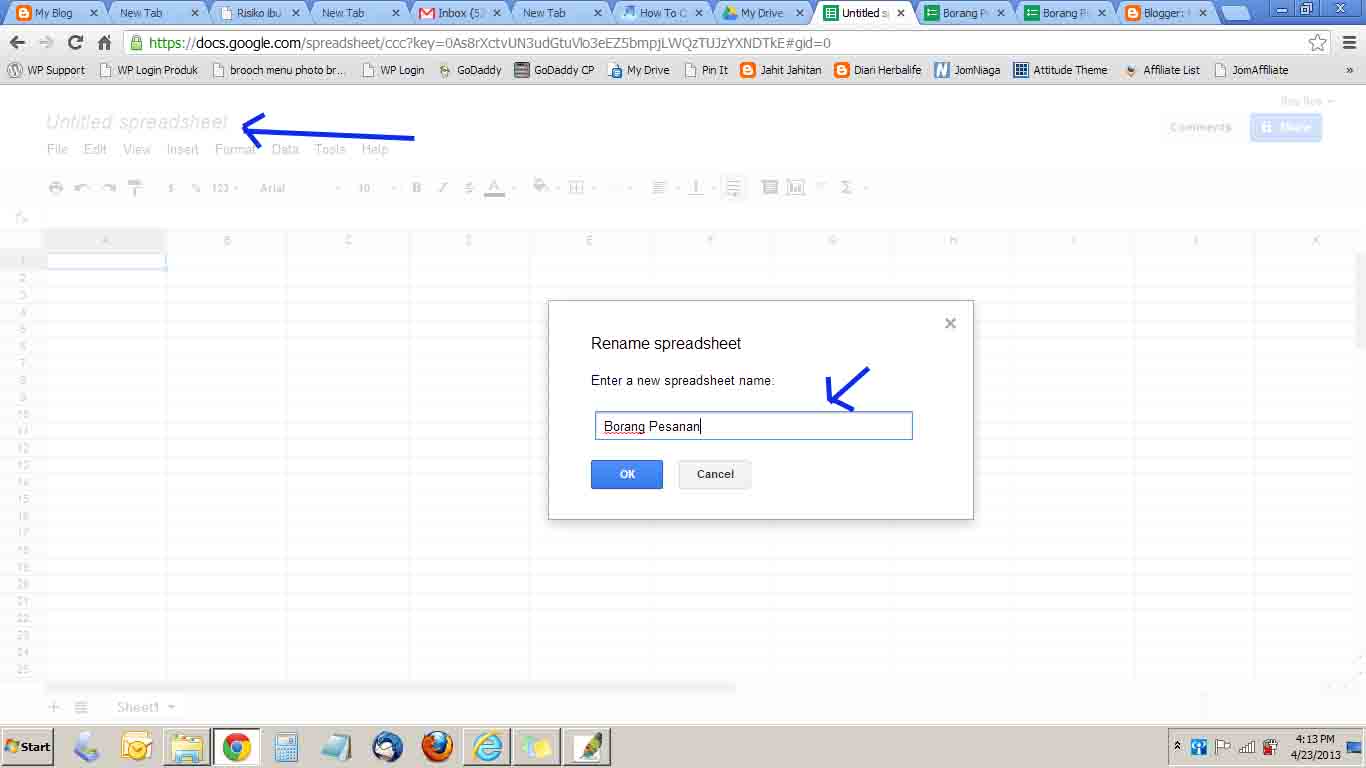
3. Rename the spreadsheet
4. Define how you want to be notified. Click Tools > Notification Rules

5. Example for step no 4 - to get a prompt notification via email when some one fill in.

6. Create the form. Click Tools> Create a form

7. Rename the form and give the description. Create your query, Name and Email address are the common ones, and click Required question each time you need it to be mandatory. (they cannot send out the form if they leave the query blank)

8. Continue adding queries. There are many format you can choose from, just play around with it and you will understand.

9. Once done, view to finalize. Click View > Live form

10. This is the Live view

11. Now you need to get the code to be embedded into your blog or web page. Click Sent Form (at the upper right corner), then another window will pop-out. Click Embed. The code will be prompt out, something like <iframe src="https://docs.google.com/forms...... Copy this. (I did not capture the right visual for the embed code (sorry) the one with smaller arrow shown is for you to link, not to embed)

12. Go to your blogger account, and create a new page, click the HTML tab and paste the code.

* yes you can as well embed this code using the text/html widget. Up to your convenience.
13. Click Compose tab to view the form, then save.

14. View your page, and you are done!
Notes:
* The next thing you want to do is to test out the form. See if the notification will get into your mailbox, and the spreadsheet. ( I love spreadsheet, because I love excel..heh)
*At any time you need to update the form, such as to add new query like the "Home Address", just go back to your Google drive, search the form you just created, and add-in new query. Save and it will refresh your web form automatically ( you dont need to amend the blogger page, or anywhere else you have pasted to)